
















xCloud automatically enables xSpeed Cache on every new WordPress site you create. It’s offered as the recommended caching option during site creation, it gets configured automatically as part of provisioning and it installs as a normal WordPress plugin with its own settings screen and setup wizard inside your wp-admin.
Why Use xSpeed Cache on xCloud #
xSpeed Cache is xCloud’s recommended caching solution because it’s built to work seamlessly with your hosting infrastructure. It integrates directly with OpenLiteSpeed, the web server that powers xCloud sites, so you get server-level caching alongside WordPress-level page and object caching in one plugin. This dual-layer approach means faster load times and better resource efficiency without configuration complexity.
Because xSpeed Cache comes pre-installed and pre-configured during provisioning, you don’t need to hunt for a caching plugin, worry about compatibility issues or spend time tuning settings. LiteSpeed Cache is automatically disabled to prevent conflicts.
There’s no separate license or additional cost involved, so you get professional-grade caching included with your xCloud plan.
This guide walks you through where you’ll see xSpeed Cache during setup, what it looks like once your site is live and how you can purge the cache or reach its own settings afterward.
How to Use xSpeed Cache on xCloud #
xCloud includes xSpeed Cache as the default caching plugin on every WordPress site you create. This guide covers where to find it during setup, how to manage it from the xCloud dashboard
Step 1: Start a New Site on Your Server #
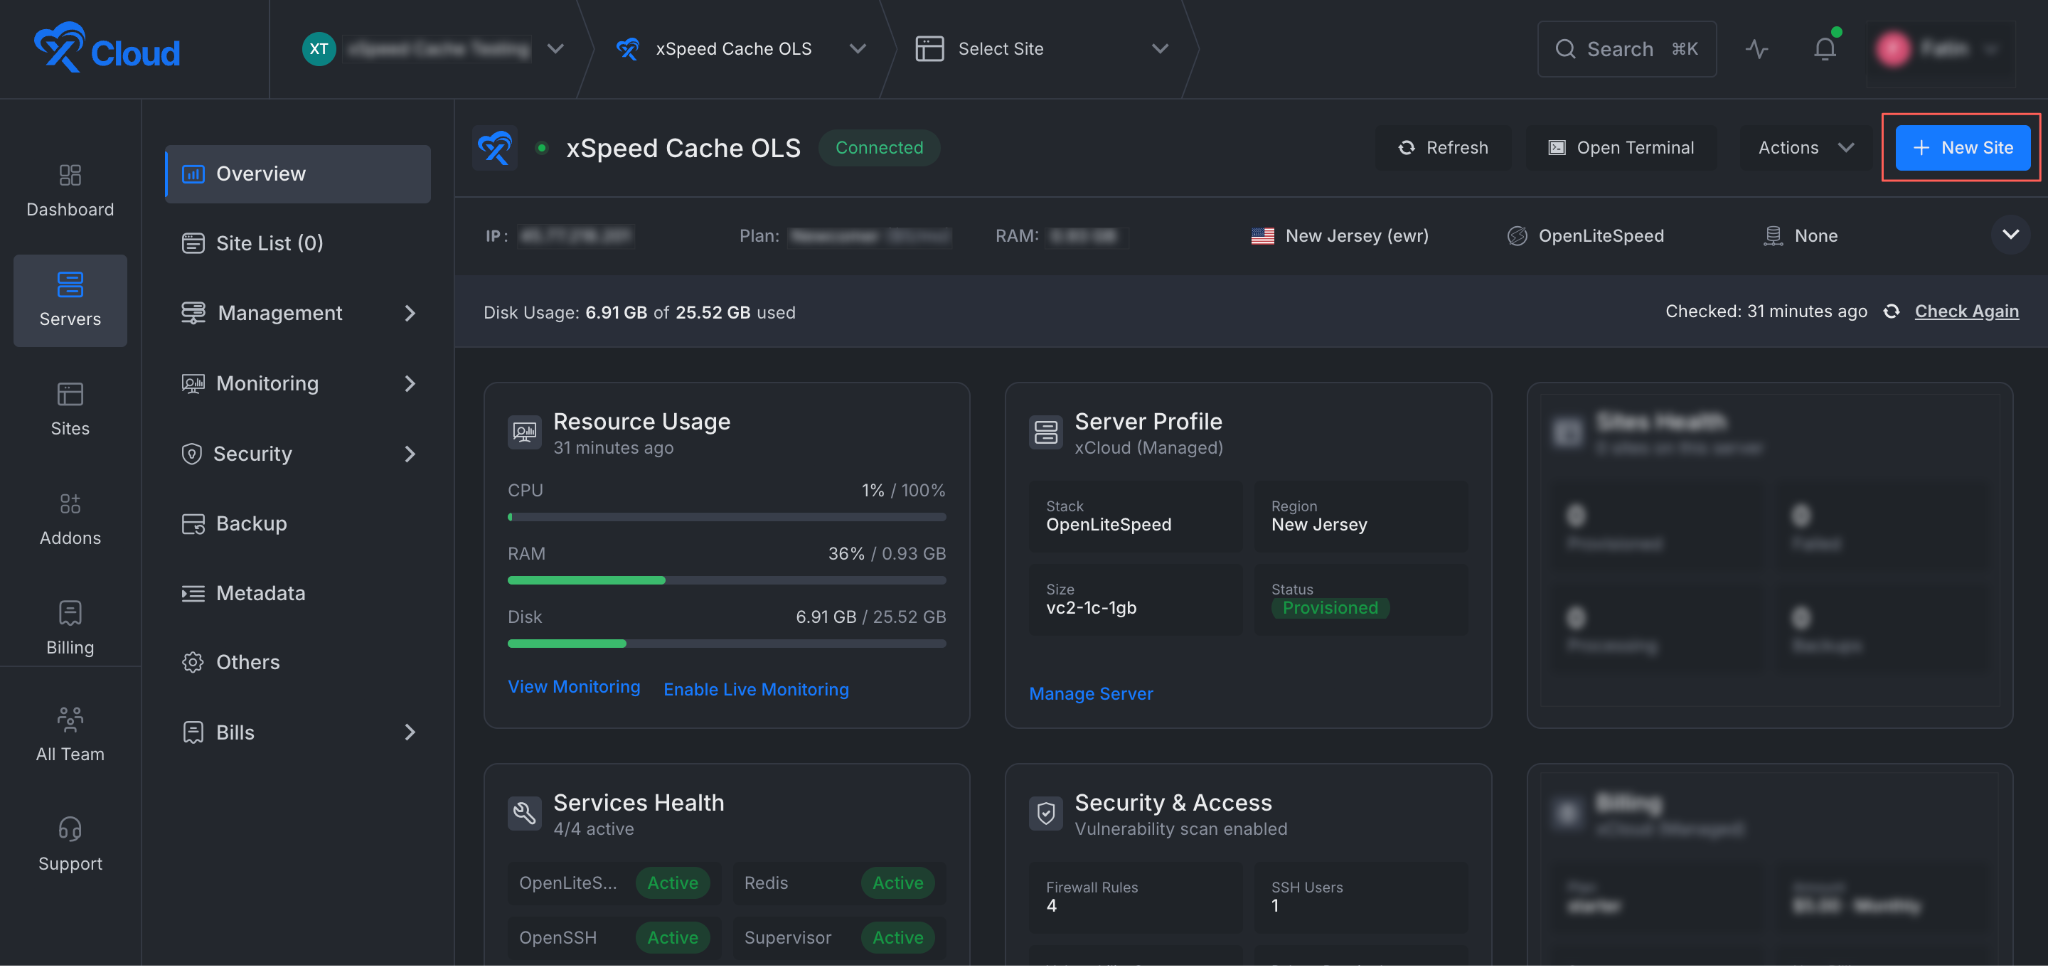
From your server’s Overview page in xCloud, click New Site to begin creating a WordPress site.
Step 2: Choose Install New WordPress Website #
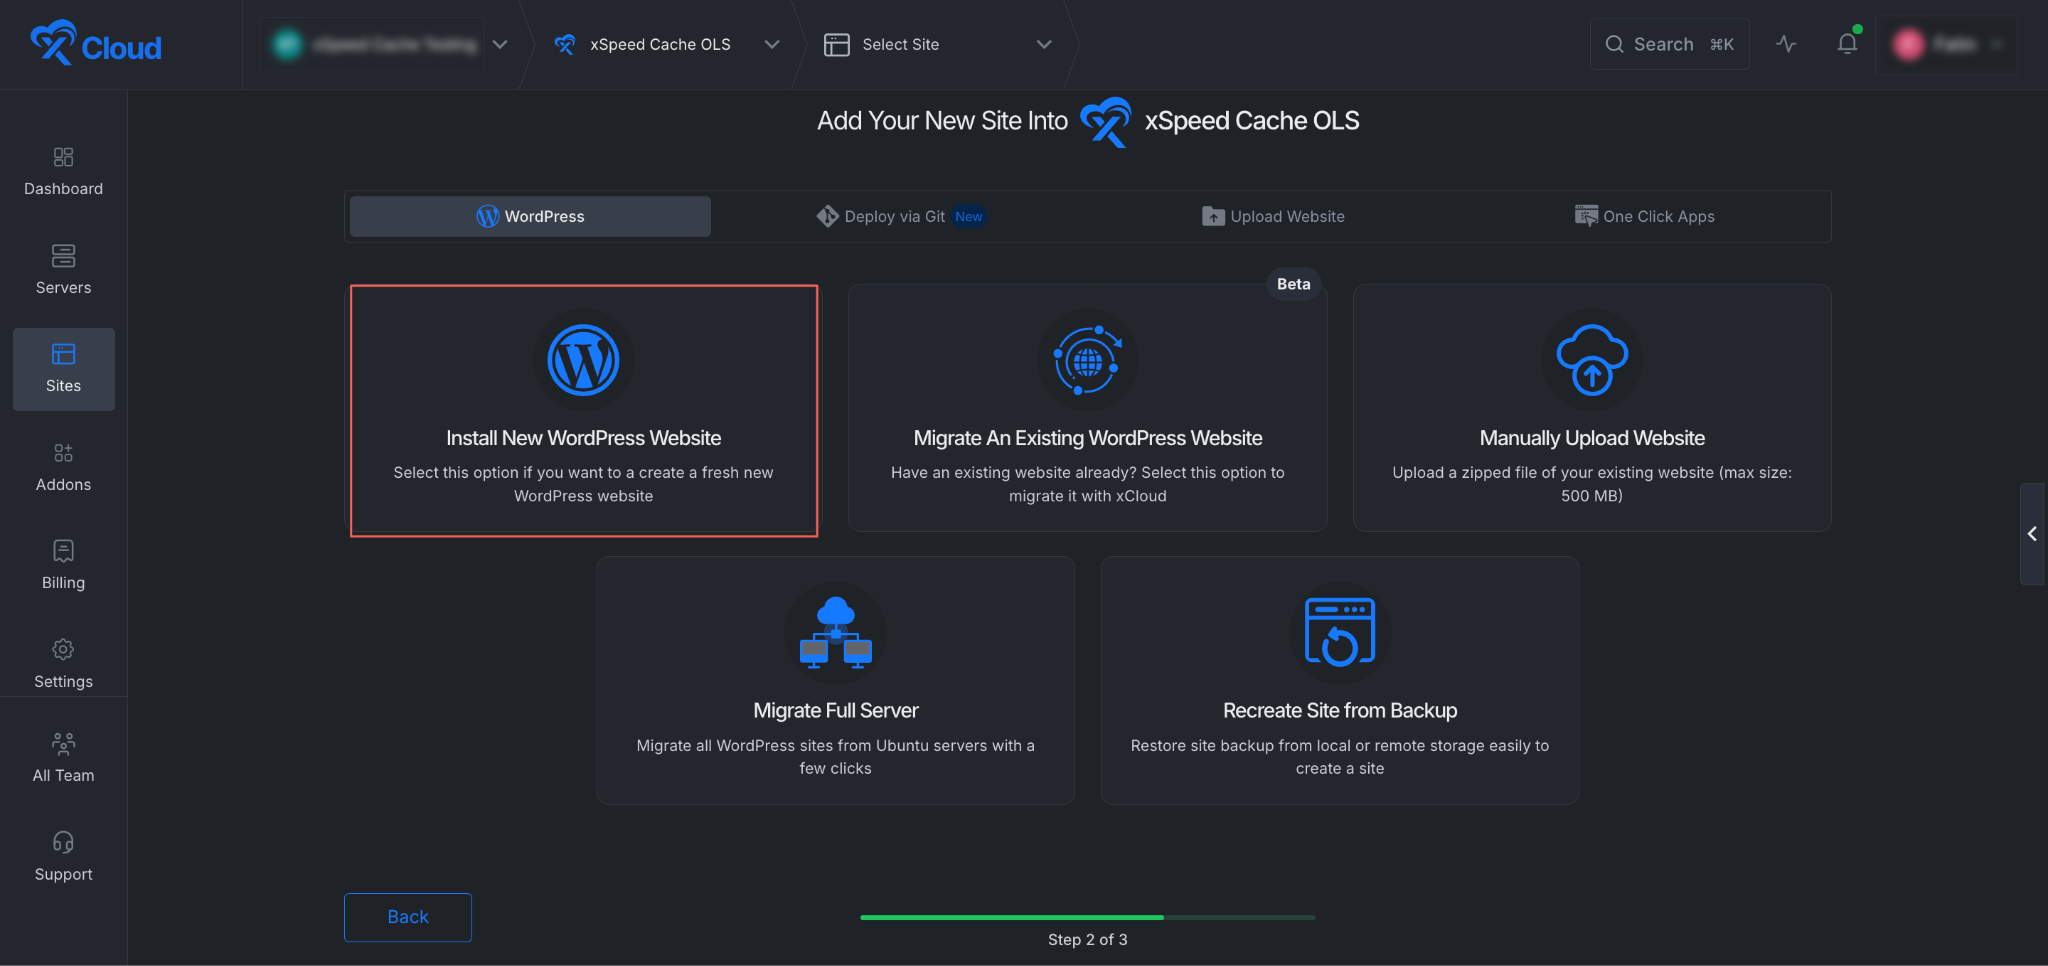
On the WordPress tab, select Install New WordPress Website to create a fresh site.
Step 3: Review the Caching Option #
Further into the setup wizard, under Enhancing Website Performance, you’ll see the caching choice for your new site.
xSpeed Cache is marked Recommended and is switched on by default.
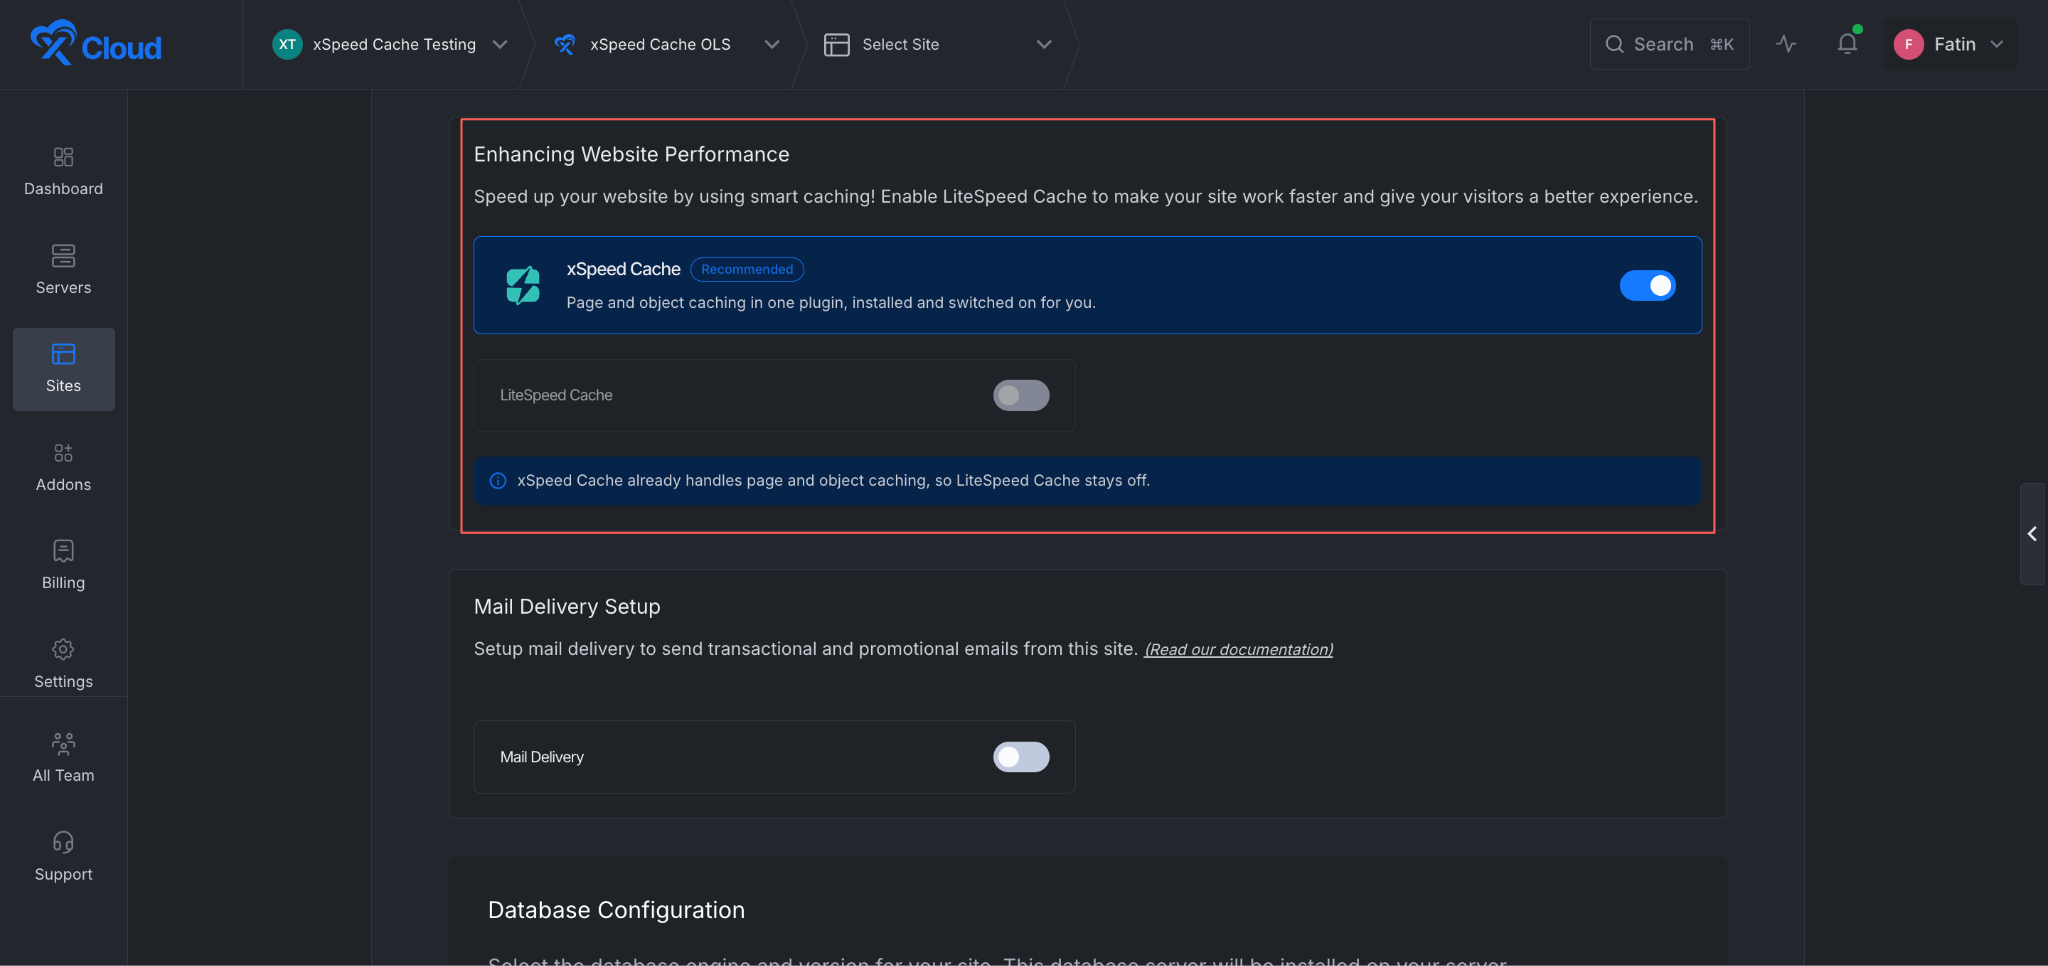
You get page and object caching in one plugin, installed and switched on for you.
Continue through the rest of the wizard (mail delivery, database configuration and so on) as usual, then submit to start provisioning.
Step 4: Watch It Get Configured During Setup #
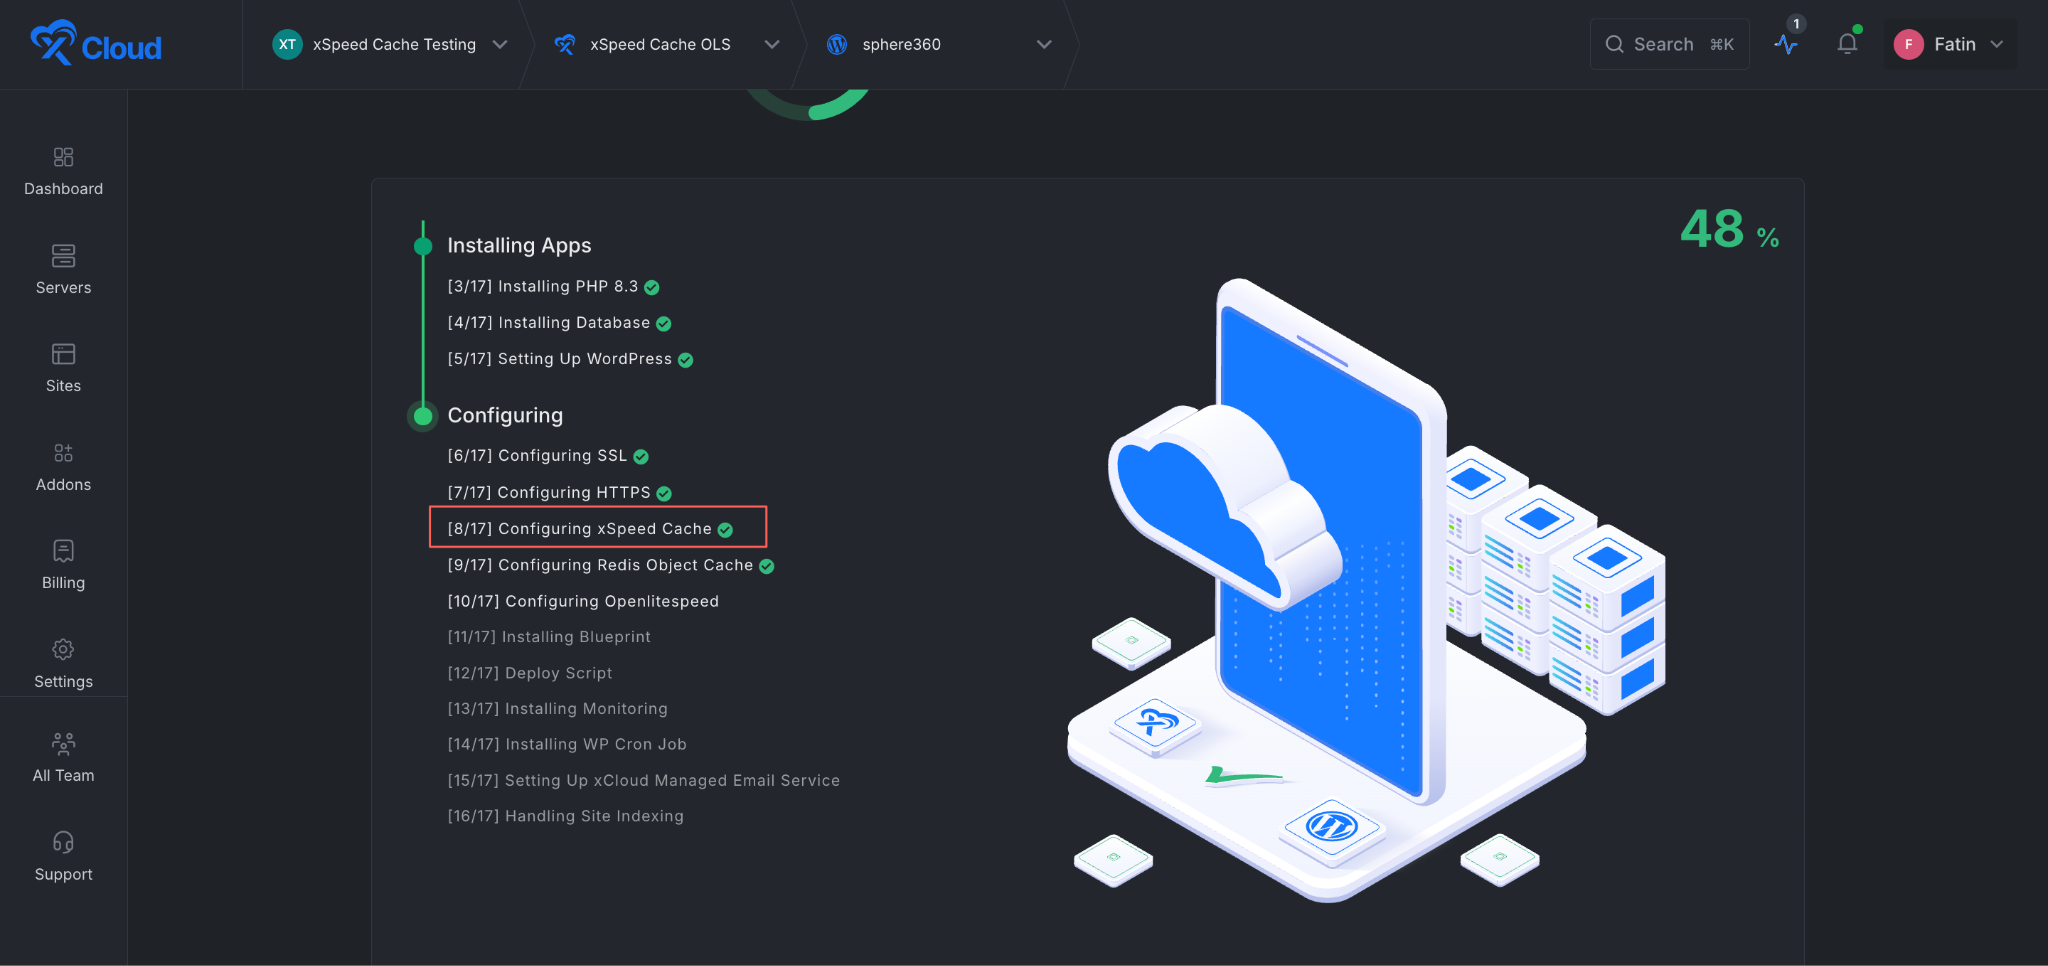
xCloud provisions your new site through a multiple step process. xSpeed Cache has a dedicated step in the Configuring stage.
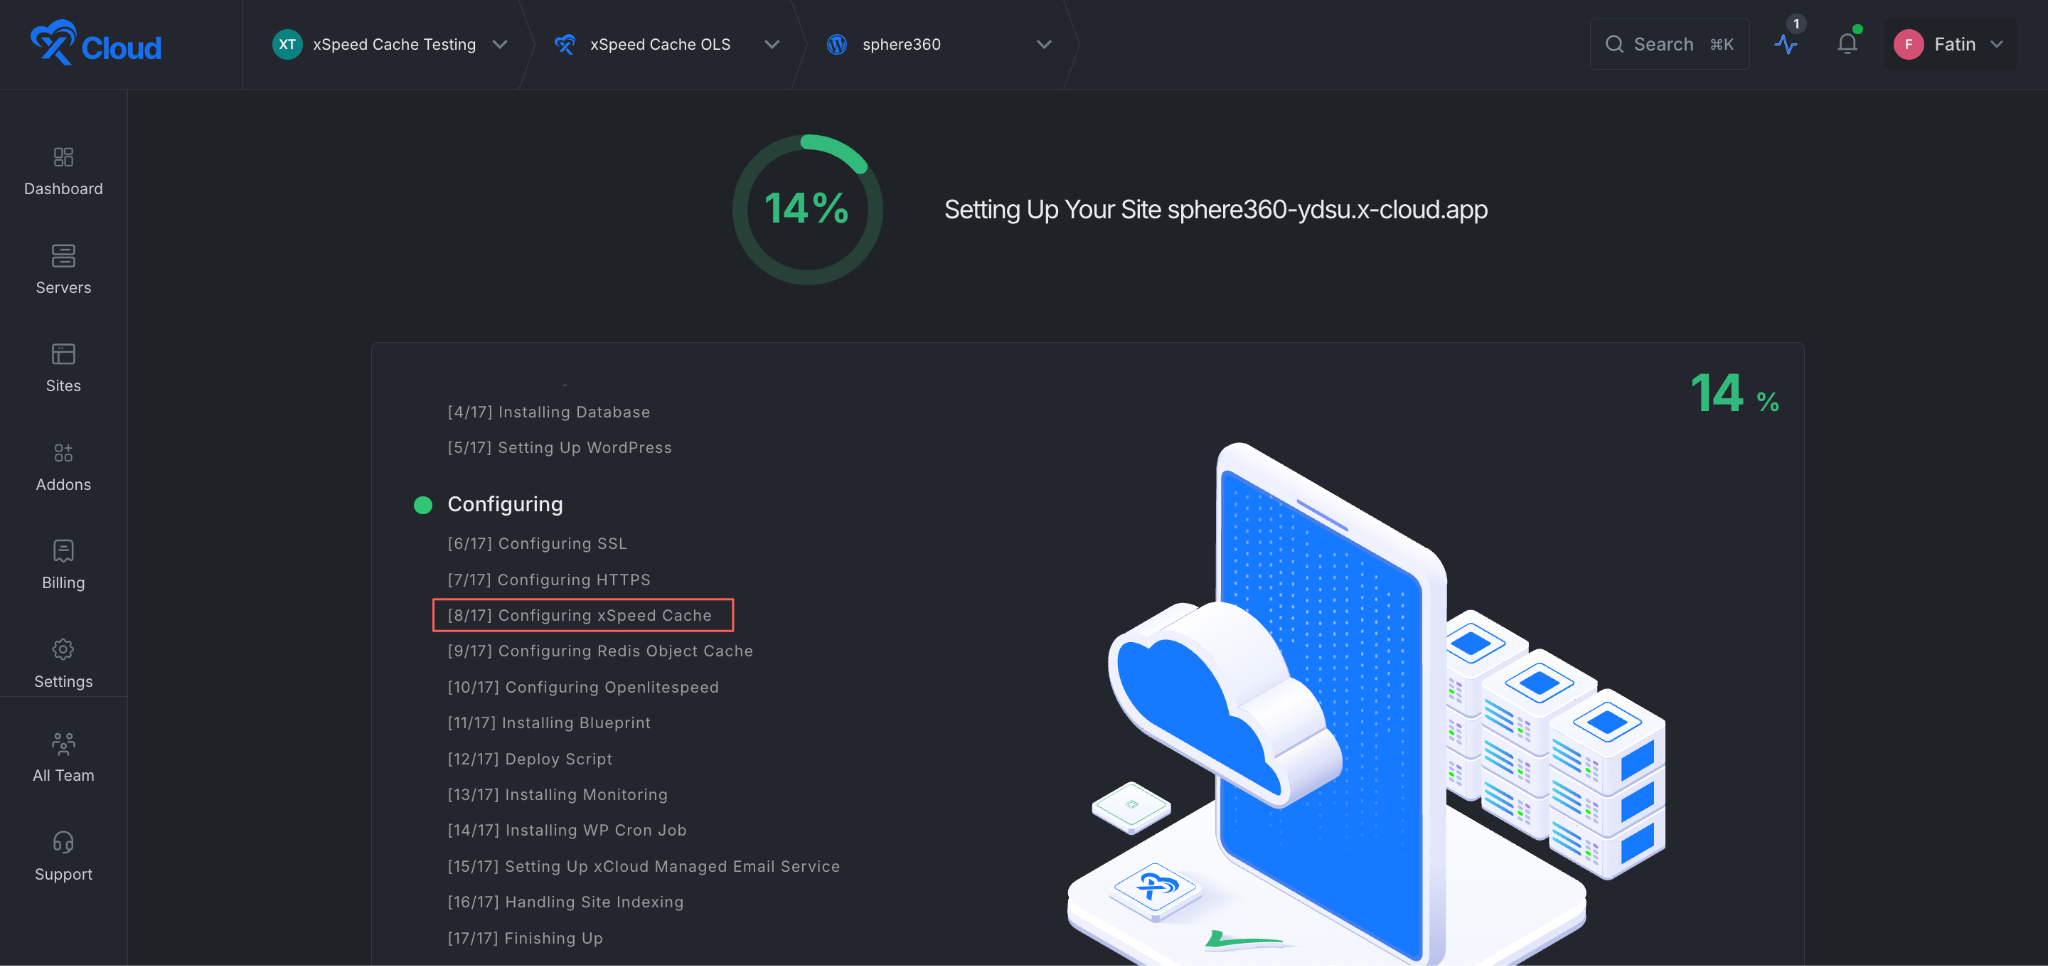
As provisioning continues, that step picks up a green checkmark once it’s done. You don’t need to take any action.
Step 5: Find xSpeed Cache in Your Site’s Caching Tab #
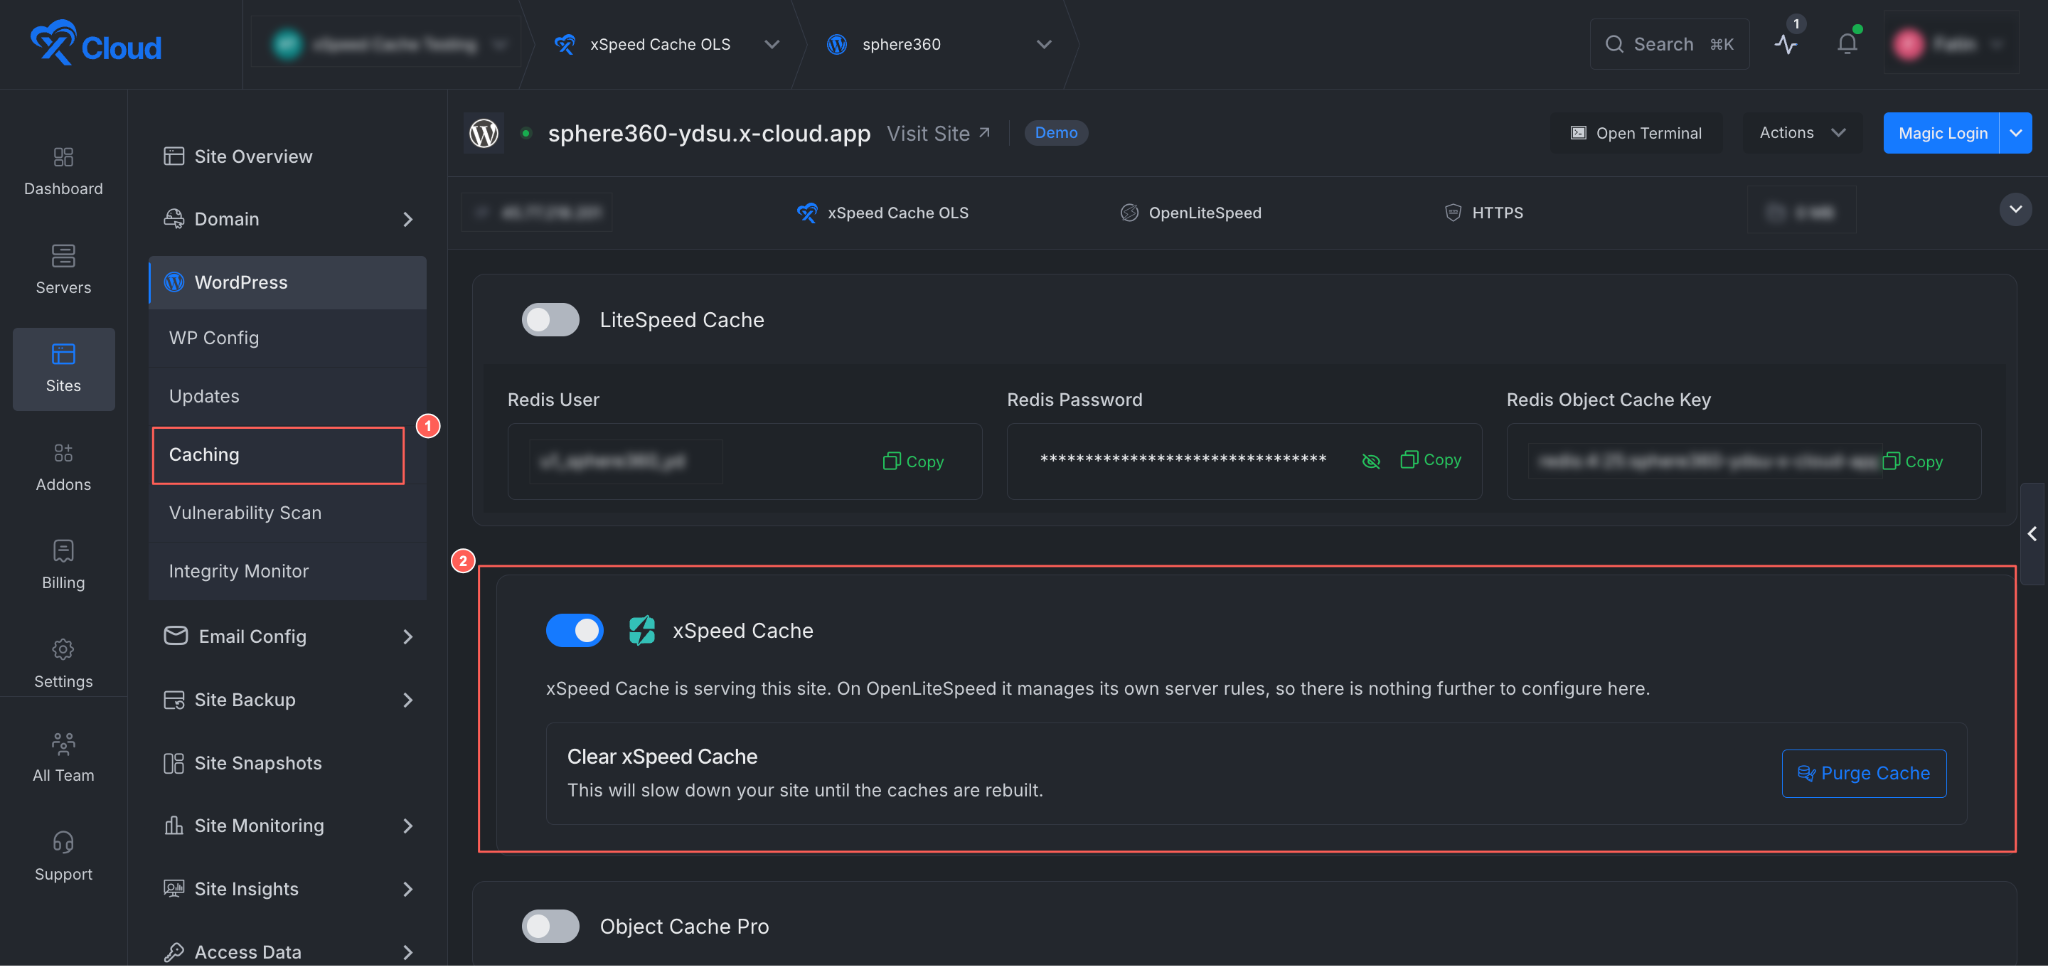
Once your site is live, you’ll find its caching setting under Sites → [your site] → WordPress → Caching in xCloud.
The xSpeed Cache toggle is on, with a short status line: “xSpeed Cache is serving this site. On OpenLiteSpeed it manages its own server rules, so there is nothing further to configure here.”
A Purge Cache button sits underneath, inside a Clear xSpeed Cache panel, with a warning that purging will briefly slow the site down while caches rebuild.
Step 6: Purge the Cache When You Need To #
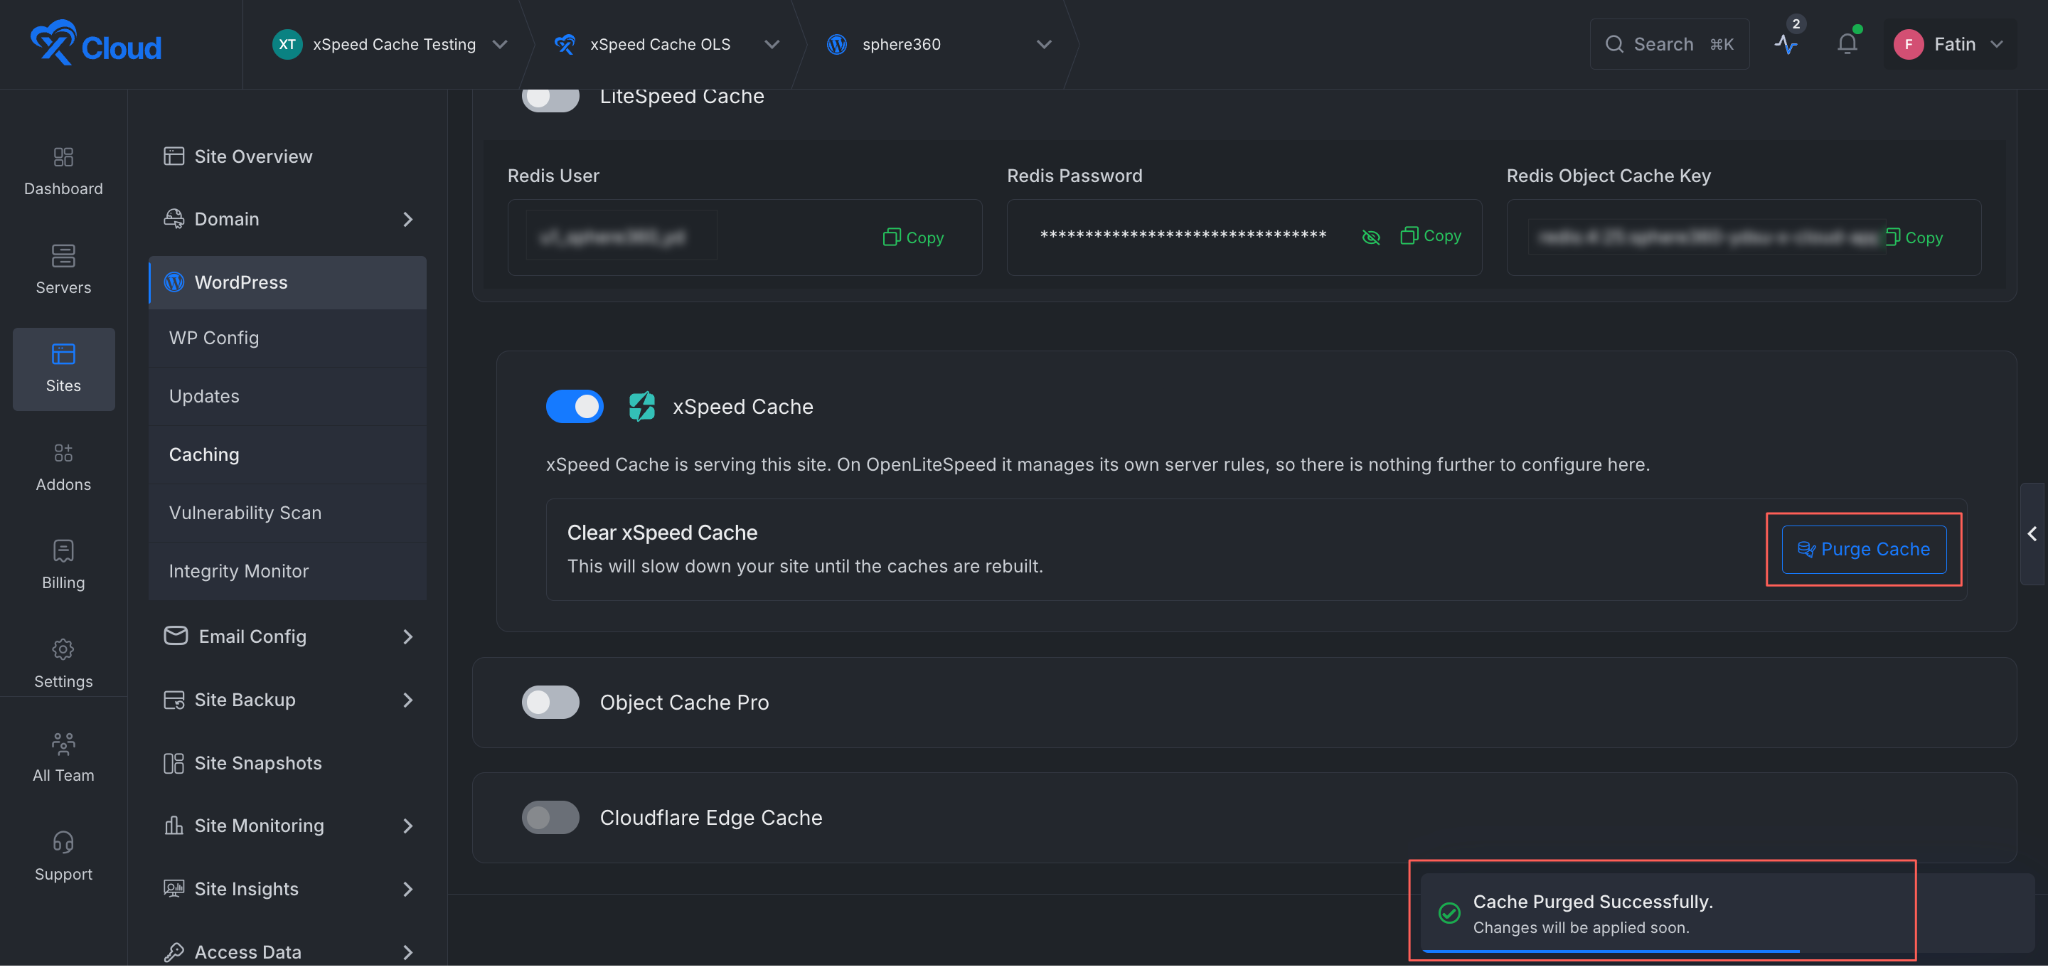
If you’ve just pushed a content or design change and want visitors to see it immediately, you can purge the cache manually.
Click Purge Cache on the Caching tab. A confirmation toast appears: “Cache Purged Successfully. Changes will be applied soon.”
Final Outcome #
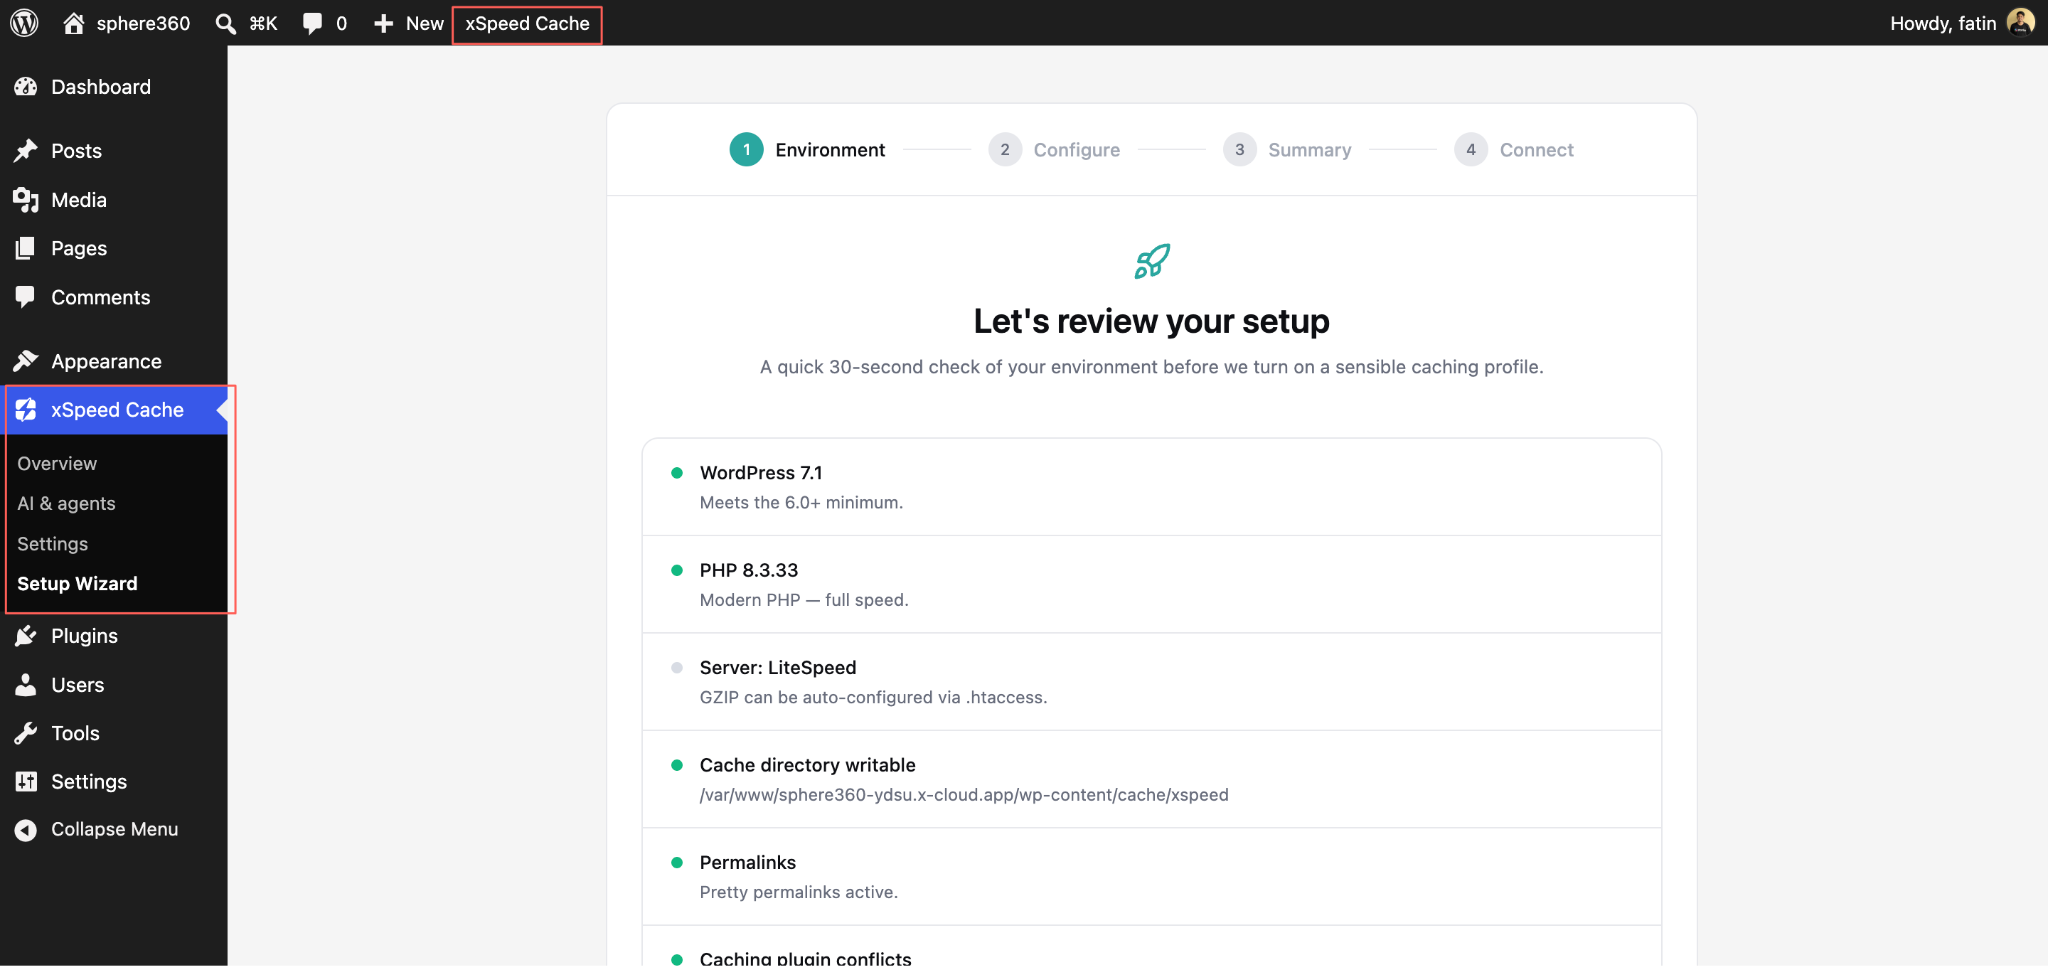
Because xSpeed Cache installs as a real WordPress plugin, you’ll also find its own menu inside wp-admin, separate from the xCloud dashboard.
In the WordPress admin sidebar, click xSpeed Cache to expand its menu: Overview, AI & agents, Settings and Setup Wizard.
Opening Setup Wizard runs a quick environment check (WordPress version, PHP version, server type, cache directory permissions, permalinks and plugin conflicts) before applying a caching profile.
This is how you can set up xSpeed Cache during site creation and control caching from both the xCloud dashboard and WordPress admin.
Still need a hand? Our support team is always happy to help. If you have any questions, feel free to reach out to our Support Team or explore more guides in the xCloud Documentation.


